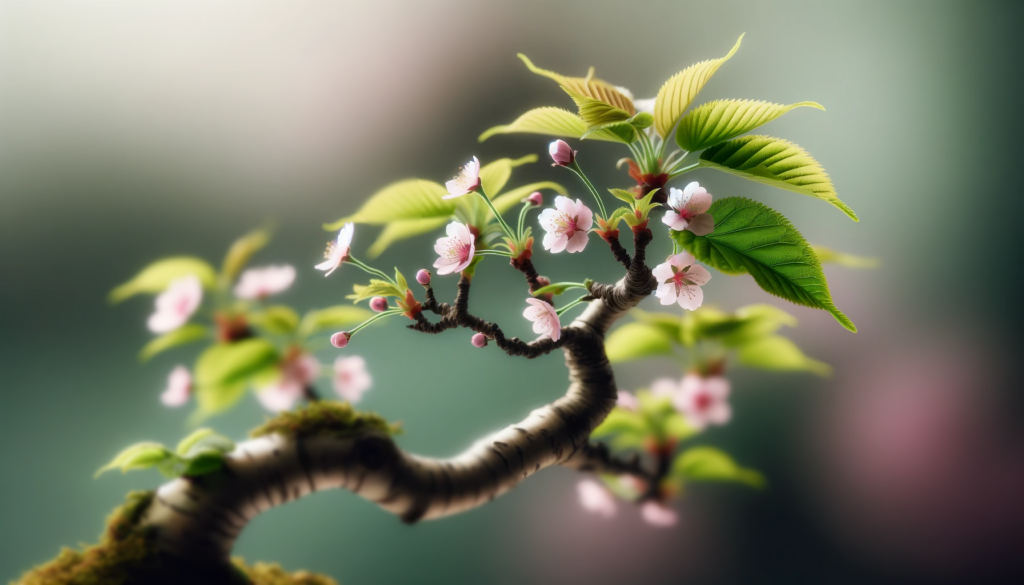
The Tropical Mimosa Bonsai is a truly beautiful and captivating tree. Its fern-like leaves and fluffy pink flowers give it a graceful and delicate appearance, making it a stunning addition to any indoor oasis. Native to Asia, this bonsai variety is highly prized for its unique foliage that sets it apart from other bonsai trees.
The Beauty of the Tropical Mimosa Bonsai

This bonsai requires full sun to thrive and should be placed in a location that receives ample sunlight throughout the day. It is important to provide well-draining soil to prevent waterlogged roots, as this can lead to root rot and other health issues for the tree.
The Tropical Mimosa Bonsai is sensitive to cold temperatures and should be protected from frost. If grown in colder climates, it is best to keep it indoors during the winter months or provide necessary protection to ensure its survival.
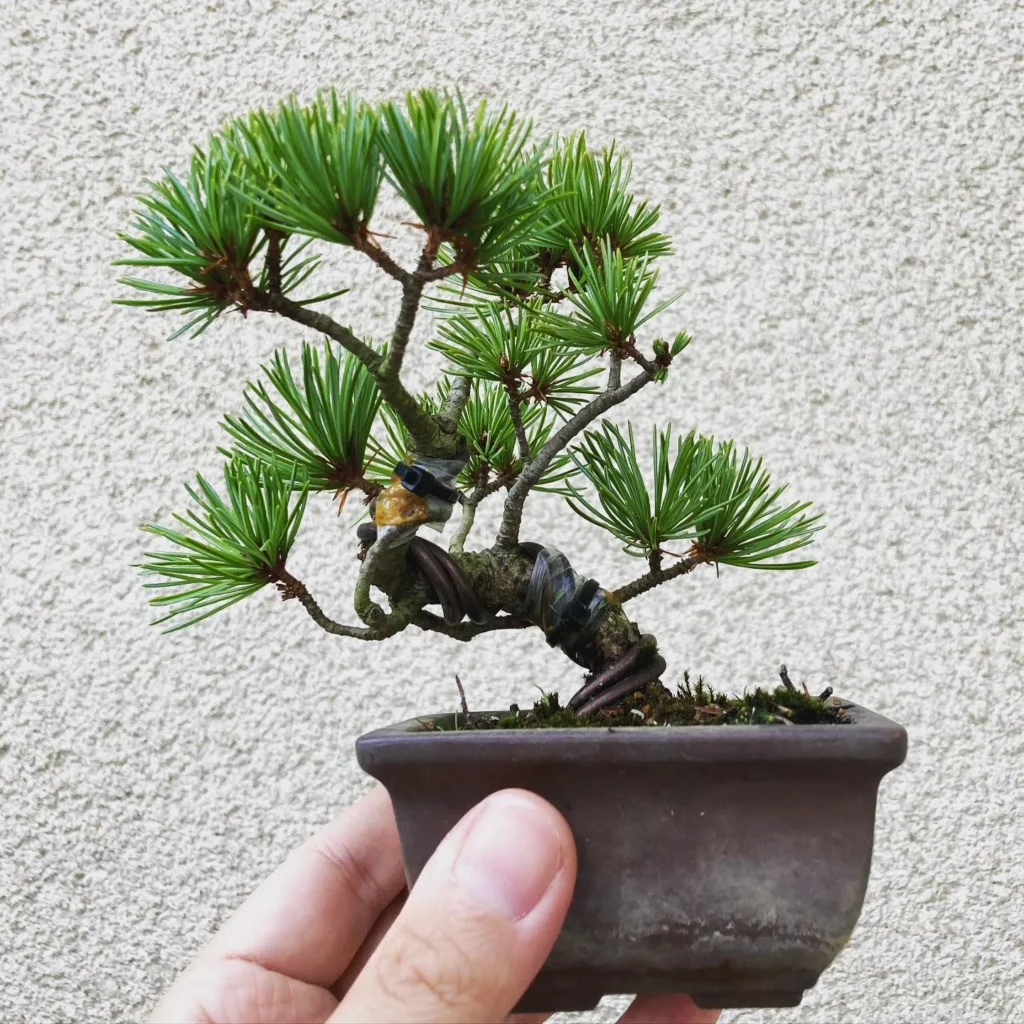
To maintain the shape and elegance of the Tropical Mimosa Bonsai, regular pruning and wiring techniques are essential. Pruning helps to remove any unwanted branches or foliage, giving the tree a clean and refined look. Wiring can be used to guide the growth of the branches, creating a harmonious and balanced shape.
Key Points:
- The Tropical Mimosa Bonsai has fern-like leaves and fluffy pink flowers, creating a graceful and delicate appearance.
- It requires full sun and well-draining soil.
- Protection from frost is necessary to ensure the tree’s survival.
- Regular pruning and wiring are important for maintaining the tree’s shape and elegance.
Placing the Tropical Mimosa Bonsai
The Tropical Mimosa Bonsai thrives in zones 6-9 and requires full sun and well-draining soil. It is important to carefully consider the placement of this unique and exotic bonsai in order to ensure its healthy growth and vibrant blooms.
1. Natural Habitat
When deciding where to place your Tropical Mimosa Bonsai, it is beneficial to understand its natural habitat. This bonsai species is native to Asia and prefers a warm and sunny environment, similar to its original surroundings.
2. Sunlight Requirements
To promote the optimal growth and overall health of your Tropical Mimosa Bonsai, it is essential to provide it with abundant sunlight. Choose a location for your bonsai where it can receive direct sunlight for at least 6 hours a day.
3. Protection from Strong Winds
While the Tropical Mimosa Bonsai thrives in full sun, it is also sensitive to strong winds. To protect your bonsai from wind damage, consider placing it in a sheltered area such as near a wall or fence.
4. Temperature Sensitivity
It is important to note that the Tropical Mimosa Bonsai is sensitive to cold temperatures. Avoid placing it in areas where it may be exposed to frost or extreme cold. Consider bringing it indoors during the winter months or providing adequate protection such as a frost cloth.
5. Aesthetic Considerations
When choosing the placement of your Tropical Mimosa Bonsai, take into account its aesthetic appeal. Consider placing it in a prominent spot where its graceful foliage and beautiful pink flowers can be admired and enjoyed.
- Choose a location with enough space for the bonsai to develop its elegant shape and form.
- Consider creating a dedicated bonsai display area or using a bonsai stand to showcase your Tropical Mimosa Bonsai.
6. Indoor Placement
If you prefer to grow your Tropical Mimosa Bonsai indoors, ensure that it receives adequate sunlight through a south-facing window or using grow lights. Monitor the temperature and humidity levels to create a suitable environment.
Pruning and Wiring Techniques for the Tropical Mimosa Bonsai

To maintain the shape and elegance of your Tropical Mimosa Bonsai, regular pruning is essential. This will prevent it from becoming overly leggy and ensure a compact and balanced appearance. When pruning, focus on removing any excessive growth, damaged or diseased branches, and any branches that disrupt the desired shape.
When pruning, use clean and sharp bonsai shears or scissors to make clean cuts. Avoid tearing or crushing the branches, as this can lead to unnecessary stress and potential infection. Make angled cuts just above a leaf node or bud, as this will promote new growth in the desired direction.
Additionally, wiring can be used to guide the growth and shape of the branches. Gentle wiring techniques allow for the creation of an elegant silhouette and add a sense of artistry to your bonsai. However, care must be taken to avoid breaking the branches, as the Tropical Mimosa Bonsai has brittle branches that can snap easily.
Pruning Tips for the Tropical Mimosa Bonsai:
- Regularly inspect your bonsai for excessive growth, damaged branches, and signs of disease.
- Prune during the appropriate season, typically in late winter or early spring before new growth begins.
- Use clean and sharp bonsai shears or scissors to make clean cuts.
- Make angled cuts just above a leaf node or bud to promote new growth.
- Remove any branches that disrupt the desired shape or hinder the overall harmony of the bonsai.
Wiring Tips for the Tropical Mimosa Bonsai:
- Select appropriate bonsai wire based on the thickness and flexibility of the branches.
- Wrap the wire gently around the branch, making sure not to dig into the bark.
- Guide the wire to create the desired shape by gently bending and positioning the branch.
- Regularly check the wire to ensure it does not bite into the branch as it grows.
- Remove the wire once the branch has set in the desired position, typically after a few months or as soon as it starts to leave marks on the branch.
Repotting the Tropical Mimosa Bonsai

The Tropical Mimosa Bonsai, a stunning and unique addition to any bonsai collection, requires regular repotting to maintain its health and vigor. Repotting is a crucial step that should be undertaken every two to three years in early spring, allowing for optimal growth and development of the tree.
During the repotting process, you have the opportunity to prune the roots and refresh the soil, providing essential nutrients and improving the bonsai’s overall well-being. Root pruning involves carefully trimming away any damaged or excessively long roots, ensuring a healthy and balanced root system.
When repotting the Tropical Mimosa Bonsai, it is important to use a well-draining soil mix specifically formulated for bonsai. A mix of Akadama, pumice, and lava rock is commonly recommended to promote proper drainage and aeration, preventing waterlogged roots.
Step-by-step Guide to Repotting the Tropical Mimosa Bonsai:
- Gently remove the bonsai from its current pot, taking care not to damage the roots.
- Inspect the roots and trim any damaged or excessively long roots using sharp, clean bonsai scissors.
- Carefully remove the old soil from the root ball, ensuring that you remove any old, compacted soil that may hinder root development.
- Prepare a new pot with a layer of bonsai soil mix at the bottom.
- Place the tropical mimosa bonsai in the center of the pot and spread the roots evenly, ensuring they are not pressed against the sides of the pot.
- Fill the remaining space in the pot with the bonsai soil mix, gently firming it around the roots to provide stability.
- Water the bonsai thoroughly, allowing excess water to drain away.
- Place the repotted bonsai in a shaded area for a few weeks to allow the roots to recover before gradually reintroducing it to its usual spot.
Other Popular Bonsai Species

In addition to the Tropical Mimosa Bonsai, there are several other popular bonsai species that you can consider adding to your collection. Each species has its own unique characteristics and requirements, offering a diverse range of choices for bonsai enthusiasts.
1. Weeping Willow: Known for its graceful, cascading branches, the weeping willow bonsai brings a touch of elegance to any bonsai garden. It requires ample sunlight and regular pruning to maintain its delicate shape.
2. Crepe Myrtle: With its vibrant flowers and attractive bark, the crepe myrtle bonsai adds a burst of color to your bonsai collection. It thrives in full sun and requires frequent pruning to promote blooming and shape control.
3. Dogwood: The dogwood bonsai is cherished for its beautiful spring blossoms and striking bark texture. It prefers partial shade and well-draining soil. Regular pruning and selective wiring help maintain its distinct branch structure.
4. Bald Cypress: The bald cypress bonsai is a deciduous conifer that is known for its stunning fall colors and unique growth habit. It thrives in wet soil and bright sunlight. Periodic pruning and wiring are necessary to shape and maintain its characteristic form.
The Artistry of Bonsai
Bonsai is more than just a hobby; it is a true art form that allows you to express your artistic vision while nurturing the beauty of nature. The artistry of bonsai lies in the intricate cultivation and styling techniques that transform ordinary trees into living works of art.
Creating a bonsai requires patience and dedication. Each tree is unique, and understanding its specific needs is crucial to its growth and development. Through careful cultivation, you can shape and prune your bonsai to create a composition that captures the essence of nature in a miniature form.
Attention to Detail
One of the key aspects of bonsai artistry is attention to detail. Every branch, leaf, and twist of the trunk is meticulously shaped to create a harmonious and balanced composition. The careful wiring of branches allows you to guide their growth and create the desired aesthetic. Small details, such as the selection of the right pot and the arrangement of rocks and moss, contribute to the overall beauty of the bonsai.
Imitating Nature
Bonsai artists strive to create a sense of realism in their creations. By observing and understanding how trees grow in the wild, they can imitate nature in their miniature works of art. The placement of branches follows the natural pattern of growth, and the styling techniques aim to replicate the effects of wind, weathering, and age. The result is a bonsai that reflects the beauty and resilience of its full-sized counterparts.
A Living Canvas
What sets bonsai apart from other art forms is its living nature. Bonsai trees evolve and change over time, just like their larger counterparts in nature. As a bonsai artist, you have the privilege of observing and nurturing your creation as it matures and develops. With each passing year, your bonsai becomes a testament to your artistry and dedication.
A Source of Inspiration
Creating and caring for bonsai can be a deeply enriching experience. It allows you to connect with nature and find inspiration in its beauty and resilience. The artistry of bonsai teaches us patience, resilience, and the value of nurturing something from its earliest stages. It is a meditative practice that provides a sense of calm and serenity in our fast-paced world.
Conclusion
The Tropical Mimosa Bonsai is a stunning addition to any indoor oasis, offering a touch of uniqueness and exotic beauty. With its fern-like leaves and delicate fluffy pink flowers, this bonsai is sure to captivate the hearts of bonsai enthusiasts. By mastering the art of its placement, pruning techniques, wiring methods, and repotting requirements, you can cultivate and maintain healthy and remarkable tropical mimosa bonsai specimens.
Creating and nurturing a tropical mimosa bonsai requires patience and dedication. By understanding the specific needs of this bonsai species, you can ensure its longevity and beauty for years to come. With the right amount of sunlight, a suitable well-draining soil, and protection from harsh elements, your tropical mimosa bonsai will thrive and grace your home with its unique elegance.
As bonsai artists, we appreciate the artistry and intricate details of these miniature trees. The Tropical Mimosa Bonsai showcases the resilience and beauty of nature on a smaller scale, allowing us to connect with nature in a unique way. Whether you are an experienced bonsai enthusiast or just starting your bonsai journey, the tropical mimosa bonsai is a captivating choice that adds a touch of natural beauty to any space.
After this check out our other articles on:
FAQ
What is the Tropical Mimosa Bonsai?
The Tropical Mimosa Bonsai is a rare tree that can be made into a bonsai and will actually bloom. It features fern-like leaves and fluffy pink flowers, giving it a graceful appearance.
What are the placement requirements for the Tropical Mimosa Bonsai?
The Tropical Mimosa Bonsai requires full sun and well-draining soil. It thrives in zones 6-9 and is sensitive to cold temperatures. It is important to provide abundant sunlight while protecting it from strong winds.
How should I prune and wire the Tropical Mimosa Bonsai?
Regular pruning is essential to maintain the shape of the Tropical Mimosa Bonsai and prevent it from becoming too leggy. The branches can be gently wired to create an elegant silhouette and guide their growth. Care must be taken to avoid breaking the brittle branches.
When should I repot the Tropical Mimosa Bonsai?
The Tropical Mimosa Bonsai should be repotted every two to three years in early spring. This allows for root pruning and the refreshment of soil, promoting healthy growth. The frequency may vary depending on the specific needs of the individual tree.
What are some other popular bonsai species?
In addition to the Tropical Mimosa Bonsai, there are other popular bonsai species such as the weeping willow, crepe myrtle, dogwood, and bald cypress. Each species has its own unique requirements for placement, pruning, and repotting.
What factors should I consider for the placement of bonsai trees?
The placement of bonsai trees is crucial for their well-being. Factors such as light, temperature, and protection from the elements play a significant role in their development. Different bonsai species have specific placement requirements based on their natural habitat.
How do pruning and wiring techniques contribute to bonsai cultivation?
Pruning helps maintain the desired shape of the tree and encourages the development of delicate branches and foliage. Wiring allows for the sculpting of the tree’s structure and the creation of the desired aesthetic. These techniques should be approached with care and precision to avoid any harm to the tree.
Why is repotting important for bonsai care?
Over time, the soil in the pot becomes depleted of nutrients, and the roots may become root-bound, hindering the tree’s growth. Repotting allows for the refreshment of soil, root pruning, and the promotion of overall health and vitality. The frequency of repotting varies depending on the species of the bonsai tree.
What is the artistry of bonsai about?
Bonsai is a remarkable art form that allows for the appreciation of nature’s beauty and resilience on a miniature scale. It requires patience, dedication, and a deep understanding of the specific needs of each individual tree. With careful cultivation and styling, bonsai enthusiasts can create living works of art that capture the essence of nature.